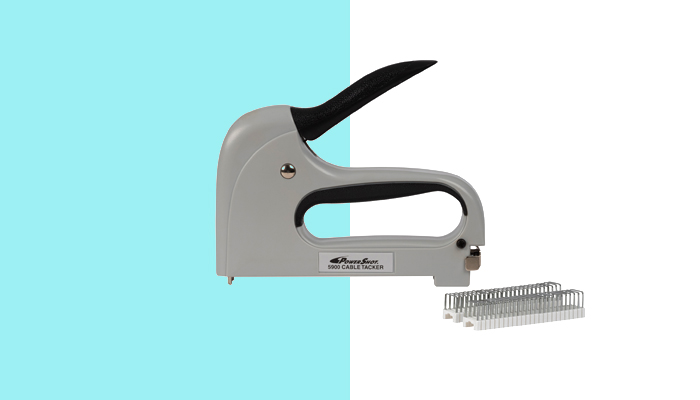
The Arrow’s PowerShot staple gun is the best-selling forward-action staple gun and brad nail gun in the US. It offers consistent performance and offers its users the versatility of using both brad nails and staples. Therefore, this staple gun will cater to all tour stapling needs.
If you are new to the PowerShot staple gun and lacks familiarity with how to load the staple gun, this article will offer you quick tips. Then, you will be able to effortlessly load the PowerShot staple gun and fire brad nails and staples on insulation, general repair, upholstery, pro-jobs, and light trim.
Steps to load the PowerShot staple gun
Loading staples
The PowerShot staple gun has a die-cast aluminum body and window for viewing staples. Therefore, you can tell if you are running low on staples and need loading. The tool has a rear-load magazine. Here are the steps you need to follow when loading staples in a PowerShot staple gun:
- Remove the pusher from the magazine by pushing it in and pulling it out. This ensures that the magazine is exposed
- Ensure that the magazine is free of debris or broken staples. This helps the firing to run smoothly without jamming
- Place a strip of staples in the guide rail. You will have to let the staples slide to the front of the staple gun
- Reinsert the pusher and it all the way in until it locks in place
- Test out your staple gun on scrap paper. It is a general rule to always test out your staple gun on scrap paper after loading to avoid messing with your project. Testing out the staple gun also ensures that the loading process was a success if there is no jamming or double firing
Loading Brad Nails
If your project dictates using brad nails instead of staples, the PowerShot staple gun is the tool for you. It allows versatility and thus you can use staples or brad nails.
Here are the steps you need to follow when loading brad nails in a PowerShot staple gun:
- Remove all the staples from the magazine if you were using staples in your previous project
- Remove the pusher from the magazine by pushing it in and pulling it out. This ensures that the magazine is exposed
- Ensure that the magazine is free of debris or broken staples. This helps the firing to run smoothly without jamming
- Insert your brad nails. Look for the nail indicator on the side of the staple gun since that is the side of the magazine that you need to install nails on
- Slide the nails in place
- Reinsert the pusher and lock it in place
- Test out your firing on scrap paper
What size of staples and brad nails does PowerShot use?
The PowerShot staple and nail gun have a forward-action design, which makes the stapling process easier. It fires 6 sizes of T50 staple types. Also, it drives 9/16 inch brad nails. It has a visual refill window that makes loading easier.
Tips for using PowerShot Staple Gun
- Be aware of the staple and nail exit point
- Point the gun away from you at all times especially when you are opening the track to clear jammed staples. This is because the jammed staple may be fired unexpectedly
- Ensure you use the correct staple size
- Be cautious not to staple into electrical wires, especially those that are hidden from view
Final Thoughts
It is important to note that before you get to fastening, understand that this is a forward-action staple gun. This means that the brad nails and staples exit through the front of the tool. Make sure that you handle it properly and carefully to avoid injuries. This article has offered the different steps you should follow when loading staples and brad nails in a PowerShot staple gun.


Leave a Reply